

1. Introduction
The LoRa UART Send/Receive Test Tool is a Windows desktop application designed for plugging two LoRa UART devices into the same PC (one as the sender, TX, and one as the receiver, RX) to test the wireless link quality between them, transfer files, and provide detailed debug logs to help diagnose issues like “RX isn’t receiving data”.
Main features include: Packet Test (adjustable packet size and interval to verify link stability), File Transfer (with automatic MD5 integrity verification), and a Debug Log (a packet-by-packet record of sent/received status for troubleshooting).
2. System Requirements
- OS: Windows 10 / 11 (64-bit)
- Two LoRa UART devices (connected to the same PC via USB-to-serial)
- To run from source: Python 3.9 or newer
- To run the packaged .exe: no Python installation needed
3. Installation & Launch
Run the .exe directly (recommended for most users)
- Obtain the LoRaUartTool_EN.exe file (you can build it yourself with build_exe.bat, see Section 6).
- Plug both LoRa UART devices into this PC via USB.
- Double-click LoRaUartTool_EN.exe to launch the app — no additional software needed.
4. Step-by-Step Instructions
Step 1: Connect the hardware
Plug both LoRa UART devices into this PC via USB, and confirm in Windows Device Manager that two COM ports appear (e.g. COM7, COM8).
Step 2: Configure “Device A” and “Device B”, then open the connections
The top of the main window shows two panels, “Device A” and “Device B”, corresponding to the two devices you plugged in.
In each panel, choose the matching COM Port (click “Refresh” if the list is stale) and Baud rate (default 115200 — this must match your LoRa module’s setting).
In the “Role” field, choose whether this device is TX (sender) or RX (receiver). One device must be TX and the other RX.
Once configured, click “Open”. The status text will change from “Disconnected” to “Connected: COMx @ 115200 (TX/RX)”.
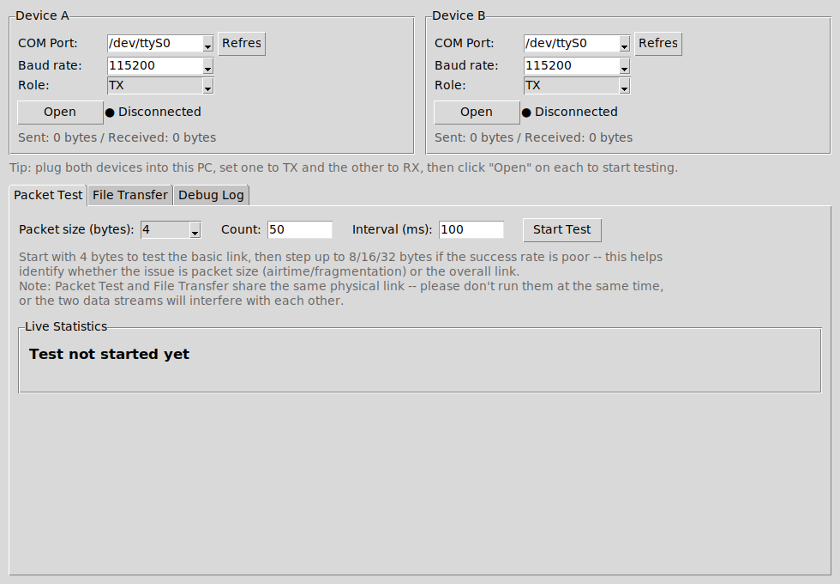
Main window: Device A / Device B panels + Packet Test tab
Step 3: Packet Test (recommended before transferring files)
Switch to the “Packet Test” tab. This sends a series of fixed-size test packets from the TX device and tallies how many the RX device actually received and how accurately, to verify basic link quality.
For “Packet size (bytes)”, start with the smallest option, 4 bytes.
Set “Count” for how many packets to send (the default of 50 is enough to see a trend), and “Interval (ms)” for the delay between packets.
Click “Start Test”. The “Live Statistics” area below updates in real time with packets sent, received correctly, CRC/content errors, estimated lost packets, and the success rate.
If the success rate isn’t 100%, try: (a) increasing “Interval (ms)”; (b) using a smaller “Packet size”; repeat until you get a stable 100% success rate — you can reuse this same setting for File Transfer later.
Once 4 bytes works reliably, try stepping up to 8 / 16 / 32 bytes to determine whether the issue is packet size (likely the LoRa module’s airtime/buffer limits) or the overall link quality.
Step 4: File Transfer
Switch to the “File Transfer” tab.
In the “Send” section at the top: click “Choose File…” to pick the file to send. For “Chunk size (bytes)”, use the stable packet size you found in Step 3. For “Send interval (ms)”, set it a bit higher than the minimum reliable interval found in the Packet Test (default 80ms — if 200ms was needed for stability there, use 200ms or more here).
Click “Start Sending”; the progress bar below shows bytes sent and the percentage complete.
In the “Receive” section below: use “Browse…” to choose the folder to save received files. Receiving happens automatically, and the progress bar shows bytes received.
When the transfer finishes, the app automatically compares the MD5 of the source file and the received file, and shows either “✅ Complete and correct” or “⚠️ File incomplete” (with details such as the number of lost packets or an MD5 mismatch if applicable).
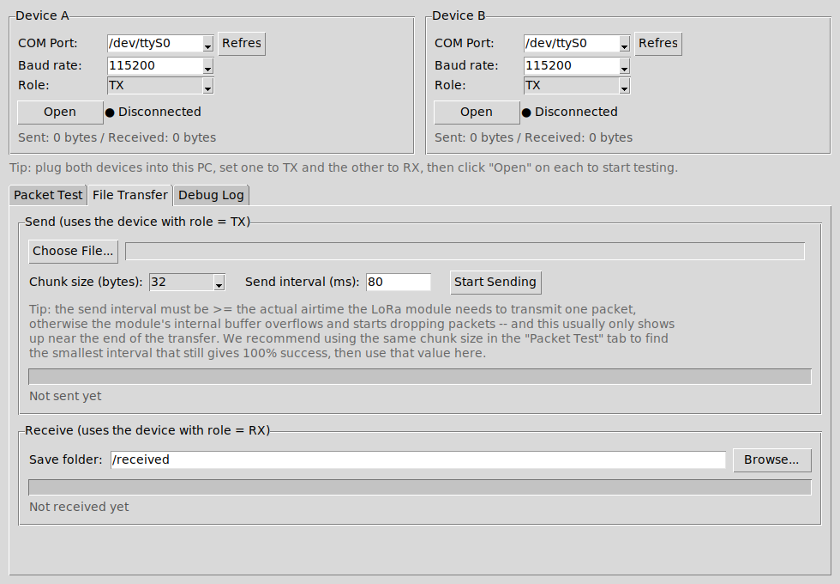
File Transfer tab: send / receive progress and results
Step 5: Diagnosing issues with the Debug Log
Switch to the “Debug Log” tab. It lists every TX-sent and RX-received event from both Packet Test and File Transfer sessions, in a single table ordered by time.
Columns include: Time, Direction (TX/RX), SEQ, Size, Status (OK/FAIL), Note, and Hex Dump. Rows with a FAIL status are highlighted in light red so problems stand out at a glance.
If you suspect dropped packets, compare the SEQ numbers TX sent against the SEQ numbers RX received to check for gaps. A CRC error usually means the data was actually corrupted in transit (noise, sending too fast, or an issue with the LoRa module itself).
“Clear Log” at the top clears the current log to start a fresh test, and “Export CSV…” saves the current log as a CSV file, handy for archiving or sharing with someone else for troubleshooting.
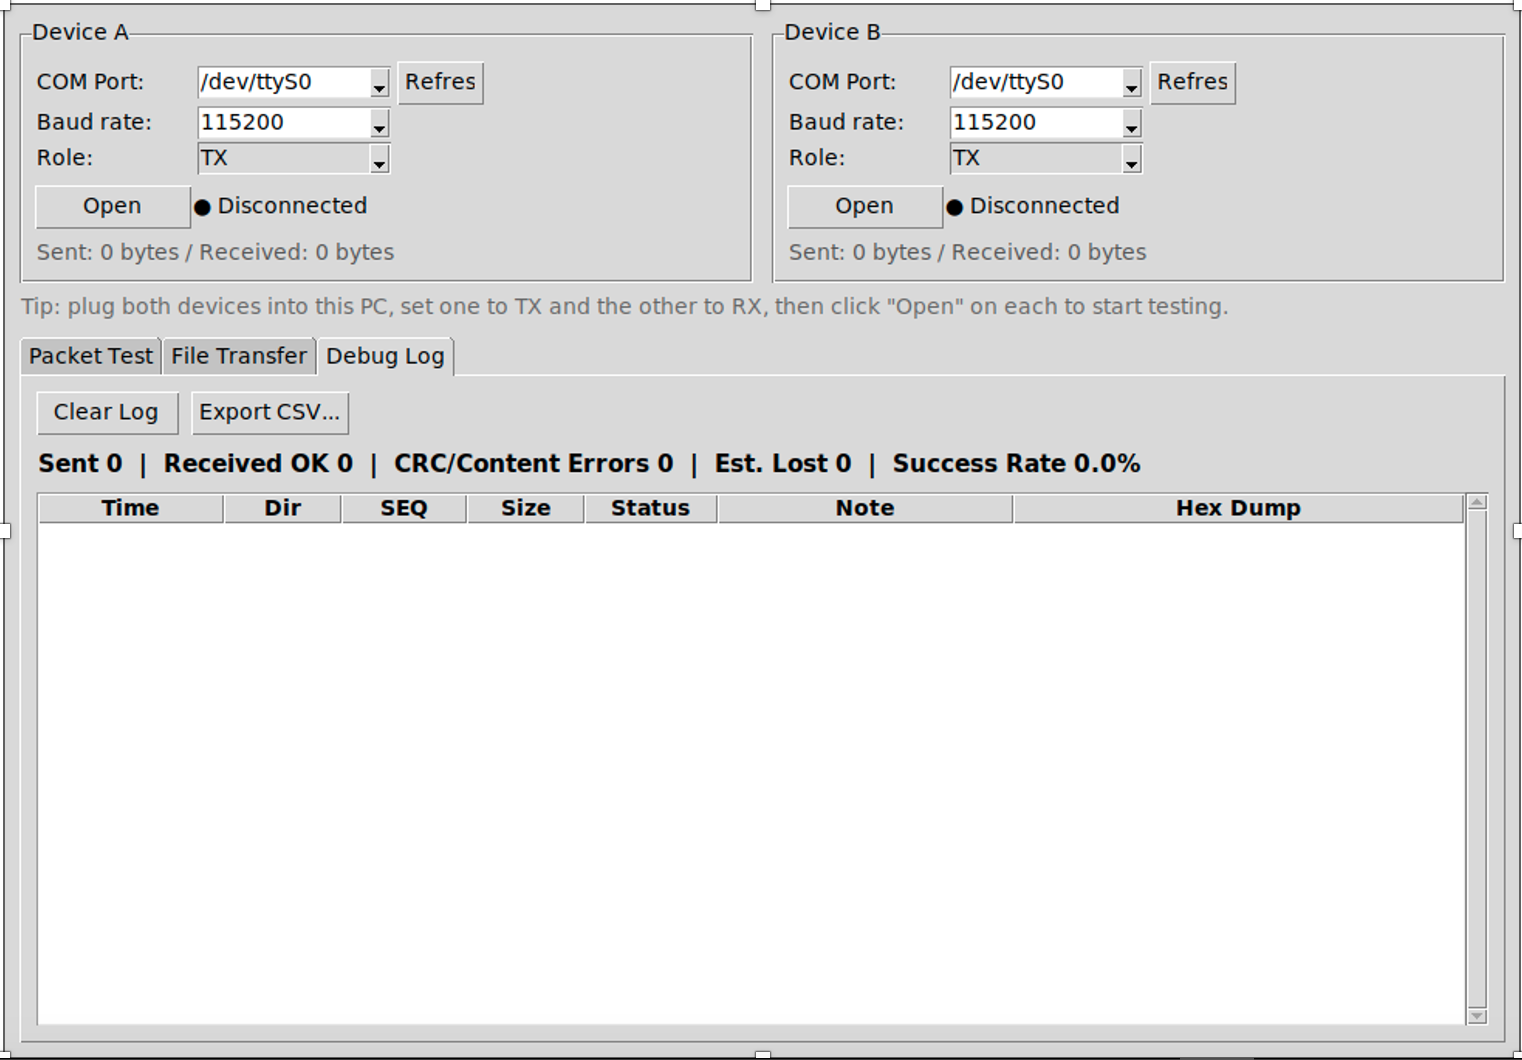
Debug Log tab: packet-by-packet log and statistics
5. Troubleshooting
Q: The Packet Test success rate is 0%, nothing is received at all.
A: First check that the roles aren’t swapped (one device must be TX, the other RX), that the correct COM Port is selected, and that both LoRa modules’ own settings (frequency, spreading factor, etc.) match.
Q: Larger packets (32 bytes) fail more often than smaller ones (4 bytes) during Packet Test.
A: This usually means the LoRa module’s airtime or internal buffer is getting tight at that packet size. Try increasing “Interval (ms)”, or stick with a smaller packet size for the transfer.
Q: The RX side only shows “File incomplete” right near the end of a file transfer.
A: This is a classic symptom of the send interval being too short — the LoRa module needs a certain amount of airtime to actually transmit each packet over the radio, and too short an interval overflows its internal buffer and drops packets, but this is usually only discovered during the final verification at the end of the transfer. Use the “Packet Test” tab with the same packet size to find the smallest interval that still gives 100% success, then use that (typically 100-200ms or more) for the File Transfer’s “Send interval (ms)”.
Q: The Debug Log shows some CRC errors, but the File Transfer result says complete and correct — is that normal?
A: Yes, that’s normal. If those CRC errors are leftover entries from a Packet Test session (check whether the Note column starts with “FILE-“), they’re unrelated to the file transfer’s correctness. What actually matters is the MD5 comparison result shown at the end of the File Transfer tab.
S/W Download
Chinese version S/W
No Comments